


Thursday, May 10, 2012
The Magnetic Scrabble Board

The Magnetic Scrabble Board!!!
To do this project you will need the following...
And old Frame (preferably a big one) if you don't have an old one you can make a frame out of wood
Sheet Metal cut to the size (this will go into the frame)
Liquid nail
Wood backing for the frame (or use what came with the frame)
old paper, for mine I will be (GASP!!) using old French Book pages... I am going to have to man up and take apart a 100 year old book.. yeah... I know (but!!! this book was going to be re-purposed into something else anyways {a Wedding book} so it really doesn't matter) :)
Decoupage
Clear coat (sealer)
Spray paint color of choice (I am a Krylon girl but if you are wanting some crazy colors something that you can't get at your local Wal Mart or home improvement store... I suggest you head over to this great place called Art Primo they are so helpful when it comes to finding the color you want, based out of Seattle, Wa. I talked to their customer service people and they were fantastic! I have two cans of this awesome Turquoise color I ordered from them sitting in the closet right now (I guess I have to find something to use it on huh?) (you will see it in this project actually)
ohhhhh and the last items you will need... scrabble tiles, magnets ( << the exact kind I ordered from the exact place... soooo if you want to do this project, I would go ahead and order them or find that size from a local store.
Now for my frame I got an OLD mirror from a local thrift store (Thrifty Living) when they first opened and it has been sitting in my back room because it was going to be a different project but I decided to do this instead.
My sheet metal I purchased from the guys at Jackson's Building Supply in Starke for under $10.00!! :D
now... on to the fun stuff..
 The start of something
PRETTTTTY!
This Mirror frame was gold. I sprayed a few coats of primer on it to get rid of the gold color.
Please be careful!! this next part can be dangerous!
Just make sure that you are EXTREMELY careful when working with cut sheet metal! (the jagged edges can cut you if you are not careful! I suggest gloves if at all possible) Went a little crazy with the glue... the pictures kind of show it.

Liquid nail + backing from the mirror that came with it. Now after you have put the liquid nail on the back, press the sheet metal on the backing. Let it set.
It is slowly coming together!

After that sets, get your old book pages (or whatever you are going to be using) and decoupage the front side of the metal (this will be the side that the magnets stick to) apply THIN coats of this { let it dry in between coats of course.} Meanwhile.....
Fell in love instantly with a little can of...

Ralph Lauren faux texture glaze... and when I say I fell in love...
I mean it! this stuff is freakin
AH-MAZE-ING! I mean look at it!
I had time to glaze my turquoise frame while the pages were still drying on the metal ...... Crickets were chirping in my head while waiting for this to dry.. but it was a necessary measure given that magnets would be scraping the surface of this constantly...

now put the pieces together (the sheet metal and the frame) attach it however it needs to be attached, mine because I used the backing that was originally with the frame I had to screw it back in place, if you are making your own, you may want to use nails or a nail gun, just so it is secure however you feel comfortable securing the pieces together, go for it.
About 10 coats total ugh.
Now the last part...

the scrabble tiles, I super glued the tiny magnets to the tiles, now here was the problem that I ran in to. the super glue will make marks on the front side of the tiles (where it absorbed straight through from the back) so to hide this I had to clear coat the tile, but the only clear coat that would work in covering this up was the Mod Podge clear acrylic sealer (after about 5 coats of min wax clear coat I got tired of wasting it so I gave Mod Podge a try and it worked! just keep in mind, the fumes were CRAZY!!! so if you have to do this, I recommend doing it outside)
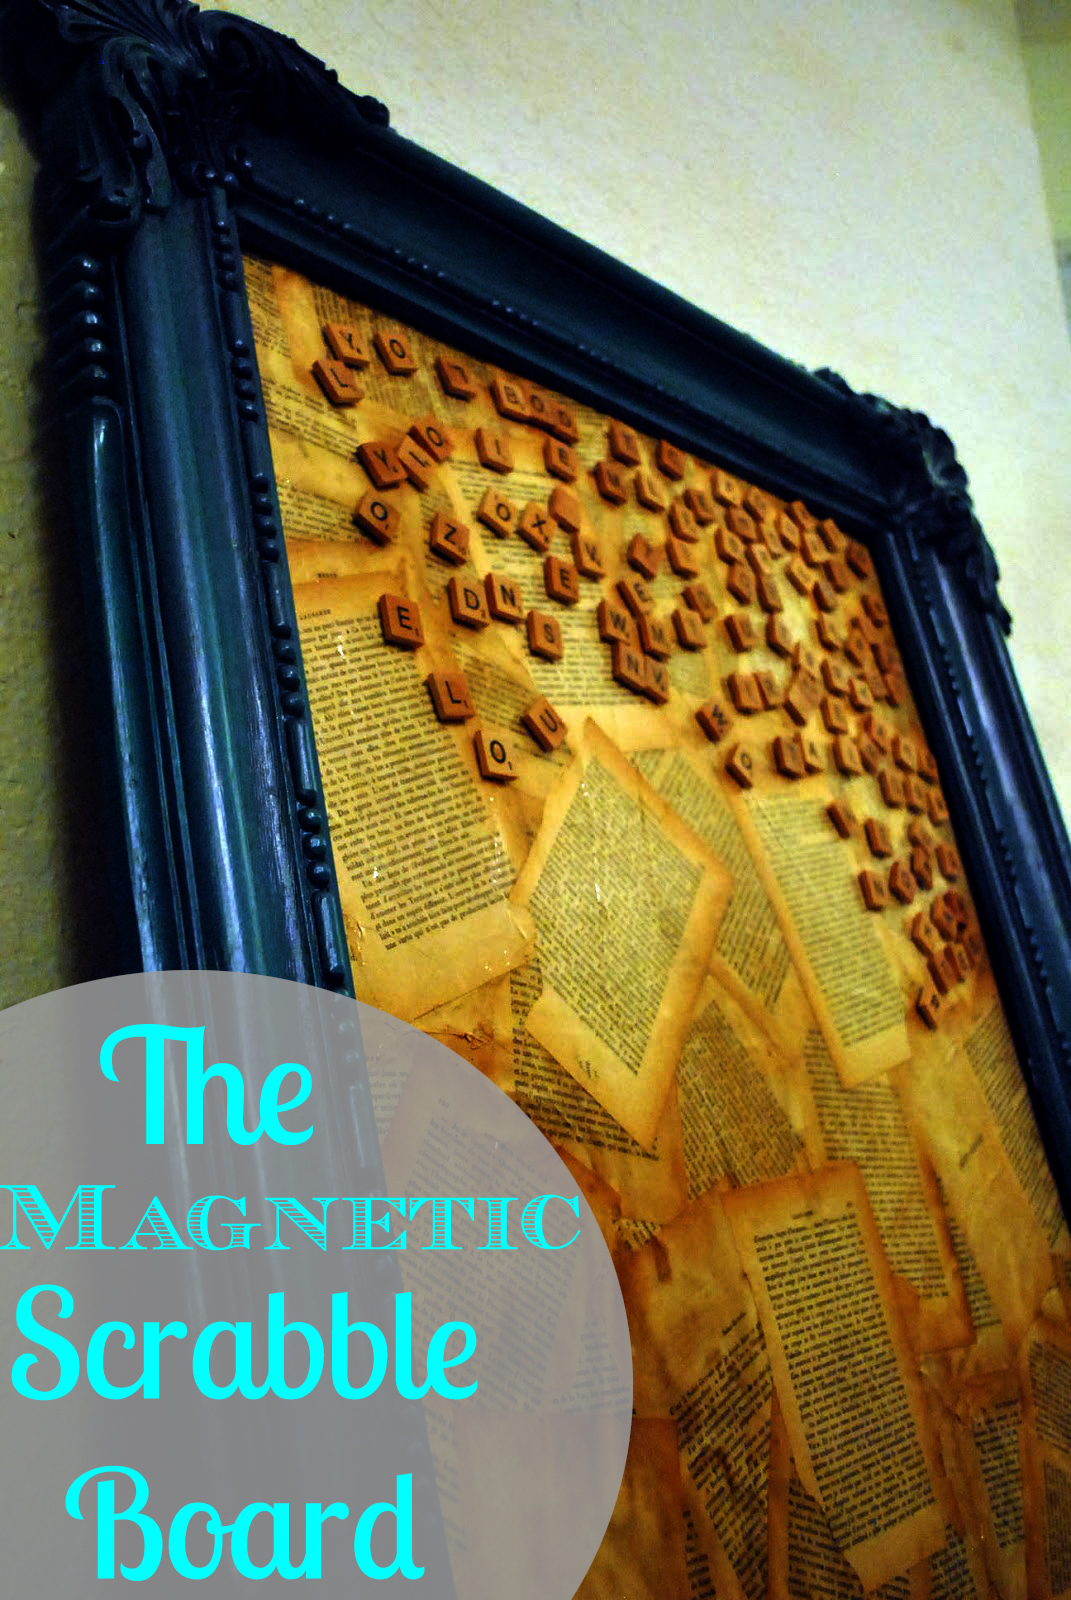
And here is the finished product...
 |
Beautiful!
Ta-Da!!!!!!!!!!!!!!!! I love this little.. errrr big board! I think all of the time spent on it was worth it! I will be adding more tiles (but just to get this DIY Tutorial done, I went with what I had)
I hope you all had fun reading and I hope this has inspired you all to do something creative!
Have a great day!

Subscribe to:
Post Comments (Atom)
Stay In Touch


Subscribe To Rue Paradis


LP


0 comments:
Post a Comment