


Saturday, June 9, 2012
Pallet Table

The Pallet Table
I have been working on this one, and if you are a Facebook fan you already had somewhat of a heads up on what this DIY is about. It is about PALLETS!!!! Yeah pallets, you know those hideous things that you see in the grocery store when they are unpacking all the new merchandise or around back of a local store? Those beat up, old, {did I mention hideous?} boards.
Now I have worked with pallet boards before, I know that they vary in size but they only vary between two sizes 3 1/2x40 and 5 1/5x40 and because I have had prior experience with pallet boards I have kind of mastered the art of pulling off the boards without them breaking and I will share this with you, my readers =) Now I will say this, this project isn't easy, but it is worth all of the work that is put into it. By work I mean blood, sweat and tears (from the blood haha!) Now another word of wisdom, when you are picking out pallets... There is something that you should look for. CODES!! yes, codes. Somewhere on the pallet printed/burned into it should be the letters HT and some numbers, you want these pallets because it means the pallet was Heat Treated as opposed to Chemically Treated...
 Now as for what I did This is what I started with:
 now the best way that I have found to go about taking the boards off... get a hammer, start at the side wedge the nail puller end in between the boards and pry them apart. IMPORTANT NOTE.. You should hear a popping sound, POPPING IS NOT THE SAME THING AS CRACKING! Lol Popping=Good Cracking=BAD! (once you hear the two different sounds you will know what I am talking about) and after you pried both nails off of the one side, move to the next (middle) and do the same thing and continue.
 |
| The start |
And now time to sand them (and this is why you want to sand them)see the before and after pic? Yeah that looks a lot better... that looks like something I would put in my living room...well getting there anyways. ;)

After the sanding is done, tack cloth comes into play, you want to use this to get all of the sawdust off of the boards before you stain them, You want to use a tact cloth because... well it has a tacky feeling to it so it grabs EVERYTHING that SHOULDN'T BE THERE.

after that, depending on what you are doing either painting or staining the boards, if you are painting go ahead and start painting (art deco and apple barrel acrylics work great {or Krylon ;) } if you are staining them you will have to Pre-treat the boards, (awww really?!) yes pre-treat because these are old boards you are working with, so the pre-treat kind of brings a little bit of life to them by making them ready for the stain (makes the stain absorb into the boards more). Now keep in mind when you get to this point, make sure that you have enough time to move onto the staining because you only 2 hours after you put the pre-treat on to stain the boards. I will usually let the pre-treat soak in for about 15 to 20 min. then after it has soaked in a bit, time to move onto staining I stained the boards with a Dark Walnut/Jacobean mixture {Minwax} so it was extremely dark (which was exactly what I wanted).
 let the stain absorb into the boards for about 15 min. Wipe off the stain and if you want it darker, do this over again, I stopped with two coats of stain and here is what it looked like.
Now, time for the moulding and attaching these boards all together, in my previous post, I mentioned that my Dad is a master carpenter ;) soooo guess where I went :) that's right, over to Mom and Dad's and here is what we did, we cut out a 16x39 inch piece of plywood and he made the moulding for me we cut it to size at 45 degree angles and then took a staple gun to all of it.

=) POWER TOOLS (= here are the pics I took while we were doing all of this (sorry if the pics are bad.. so is my phone haha! it has been dropped more times than I've had a birthday)
Now that the fun stuff is done, time to paint the moulding, now what I used was a sponge brush from my go to place (wally world!) and art deco paints (black and metallic gold) now to make this process go a little faster I dry brushed it {Dry Brushing is putting very little paint on the brush and painting it with as little paint as possible so it dries faster} I did this twice... Then, after this was done it is time to use the metallic gold paint to get it into the cracks, dings and where the moulding pieces met. Here is how I did it
Now that the fun stuff is done, time to paint the moulding, now what I used was a sponge brush from my go to place (wally world!) and art deco paints (black and metallic gold) now to make this process go a little faster I dry brushed it {Dry Brushing is putting very little paint on the brush and painting it with as little paint as possible so it dries faster} I did this twice... Then, after this was done it is time to use the metallic gold paint to get it into the cracks, dings and where the moulding pieces met. Here is how I did it

and here is the final piece I hope you all enjoyed the tutorial!


Thursday, May 31, 2012
{The Effects of Being} a Master Carpenters Daughter...
{The Effects of Being} a Master Carpenters Daughter…
So my Dad is awesome! (I “may” be biased because it is MY Dad, or maybe a hint of Daddy's Girl syndrome kicking in and showing through) But in any event, I know a lot about things that a typical girl wouldn't know and it is because of my Dad that I know these things. Here is a prime example, I love doing hard projects, things that involve power tools and hammers and nails and the occasional blood and band aids, and needless to say I am not afraid to get my hands dirty. Snakes and spiders? Ha.. I laugh in the face of danger… ok not really… I laugh in the face of the things I KNOW aren't poisonous…like a ferocious squirrel…or a rabid lizard… you know the small ones.... Yep... gotta watch out for those rabid lizards... they'll gettcha...

Today my Dad laughed at me when I told him I was going to the hardware store to get some tools I think he laughed because his only daughter is sort of following in his footsteps when it comes to woodworking projects. When I don't know just how dark Ebony stain REALLY is, I call him because he would know and has some in his shop. I know what chair rail, crown moulding, base boards, insets, panels, saw horses, vices and drill bits are and how to; pretreat, stain, and clear coat a piece of wood. All because of my Dad. (I also picked up a few A LOT of car maintenance lessons as well ;) <<<Haha! ) But I know the quality of my Dad's work and when I build my house, I want Dad to do the woodwork in it. I mean, I walk into a Lowe's or a Home Depot and I can pick apart the cabinetry work (and no offense to anyone who is reading this who works for or bought from either of those companies) But I look at how things line up, I look and see if I see the nails from the nail guns, I check to see if the pieces are flush. I check to see what type of wood was used and if it is even worth what they are charging. I always walk away disappointed and what kills me is that most people don't look at these things and pay the money for such poor craftsmanship. I think I know more than any normal girl would about more "boy" type things thanks to my Dad. and I am happy about that, because for the most part... I don't need to wait around for help I can honestly {usually} do what the initials mean...
DO.
IT.
YOURSELF
Bye for now!
Thursday, May 10, 2012
The Magnetic Scrabble Board
The Magnetic Scrabble Board!!!

To do this project you will need the following...
And old Frame (preferably a big one) if you don't have an old one you can make a frame out of wood
Sheet Metal cut to the size (this will go into the frame)
Liquid nail
Wood backing for the frame (or use what came with the frame)
old paper, for mine I will be (GASP!!) using old French Book pages... I am going to have to man up and take apart a 100 year old book.. yeah... I know (but!!! this book was going to be re-purposed into something else anyways {a Wedding book} so it really doesn't matter) :)
Decoupage
Clear coat (sealer)
Spray paint color of choice (I am a Krylon girl but if you are wanting some crazy colors something that you can't get at your local Wal Mart or home improvement store... I suggest you head over to this great place called Art Primo they are so helpful when it comes to finding the color you want, based out of Seattle, Wa. I talked to their customer service people and they were fantastic! I have two cans of this awesome Turquoise color I ordered from them sitting in the closet right now (I guess I have to find something to use it on huh?) (you will see it in this project actually)
ohhhhh and the last items you will need... scrabble tiles, magnets ( << the exact kind I ordered from the exact place... soooo if you want to do this project, I would go ahead and order them or find that size from a local store.
Now for my frame I got an OLD mirror from a local thrift store (Thrifty Living) when they first opened and it has been sitting in my back room because it was going to be a different project but I decided to do this instead.
My sheet metal I purchased from the guys at Jackson's Building Supply in Starke for under $10.00!! :D
now... on to the fun stuff..
 The start of something
PRETTTTTY!
This Mirror frame was gold. I sprayed a few coats of primer on it to get rid of the gold color.
Please be careful!! this next part can be dangerous!
Just make sure that you are EXTREMELY careful when working with cut sheet metal! (the jagged edges can cut you if you are not careful! I suggest gloves if at all possible) Went a little crazy with the glue... the pictures kind of show it.

Liquid nail + backing from the mirror that came with it. Now after you have put the liquid nail on the back, press the sheet metal on the backing. Let it set.
It is slowly coming together!

After that sets, get your old book pages (or whatever you are going to be using) and decoupage the front side of the metal (this will be the side that the magnets stick to) apply THIN coats of this { let it dry in between coats of course.} Meanwhile.....
Fell in love instantly with a little can of...

Ralph Lauren faux texture glaze... and when I say I fell in love...
I mean it! this stuff is freakin
AH-MAZE-ING! I mean look at it!
I had time to glaze my turquoise frame while the pages were still drying on the metal ...... Crickets were chirping in my head while waiting for this to dry.. but it was a necessary measure given that magnets would be scraping the surface of this constantly...

now put the pieces together (the sheet metal and the frame) attach it however it needs to be attached, mine because I used the backing that was originally with the frame I had to screw it back in place, if you are making your own, you may want to use nails or a nail gun, just so it is secure however you feel comfortable securing the pieces together, go for it.
About 10 coats total ugh.
Now the last part...
the scrabble tiles, I super glued the tiny magnets to the tiles, now here was the problem that I ran in to. the super glue will make marks on the front side of the tiles (where it absorbed straight through from the back) so to hide this I had to clear coat the tile, but the only clear coat that would work in covering this up was the Mod Podge clear acrylic sealer (after about 5 coats of min wax clear coat I got tired of wasting it so I gave Mod Podge a try and it worked! just keep in mind, the fumes were CRAZY!!! so if you have to do this, I recommend doing it outside)
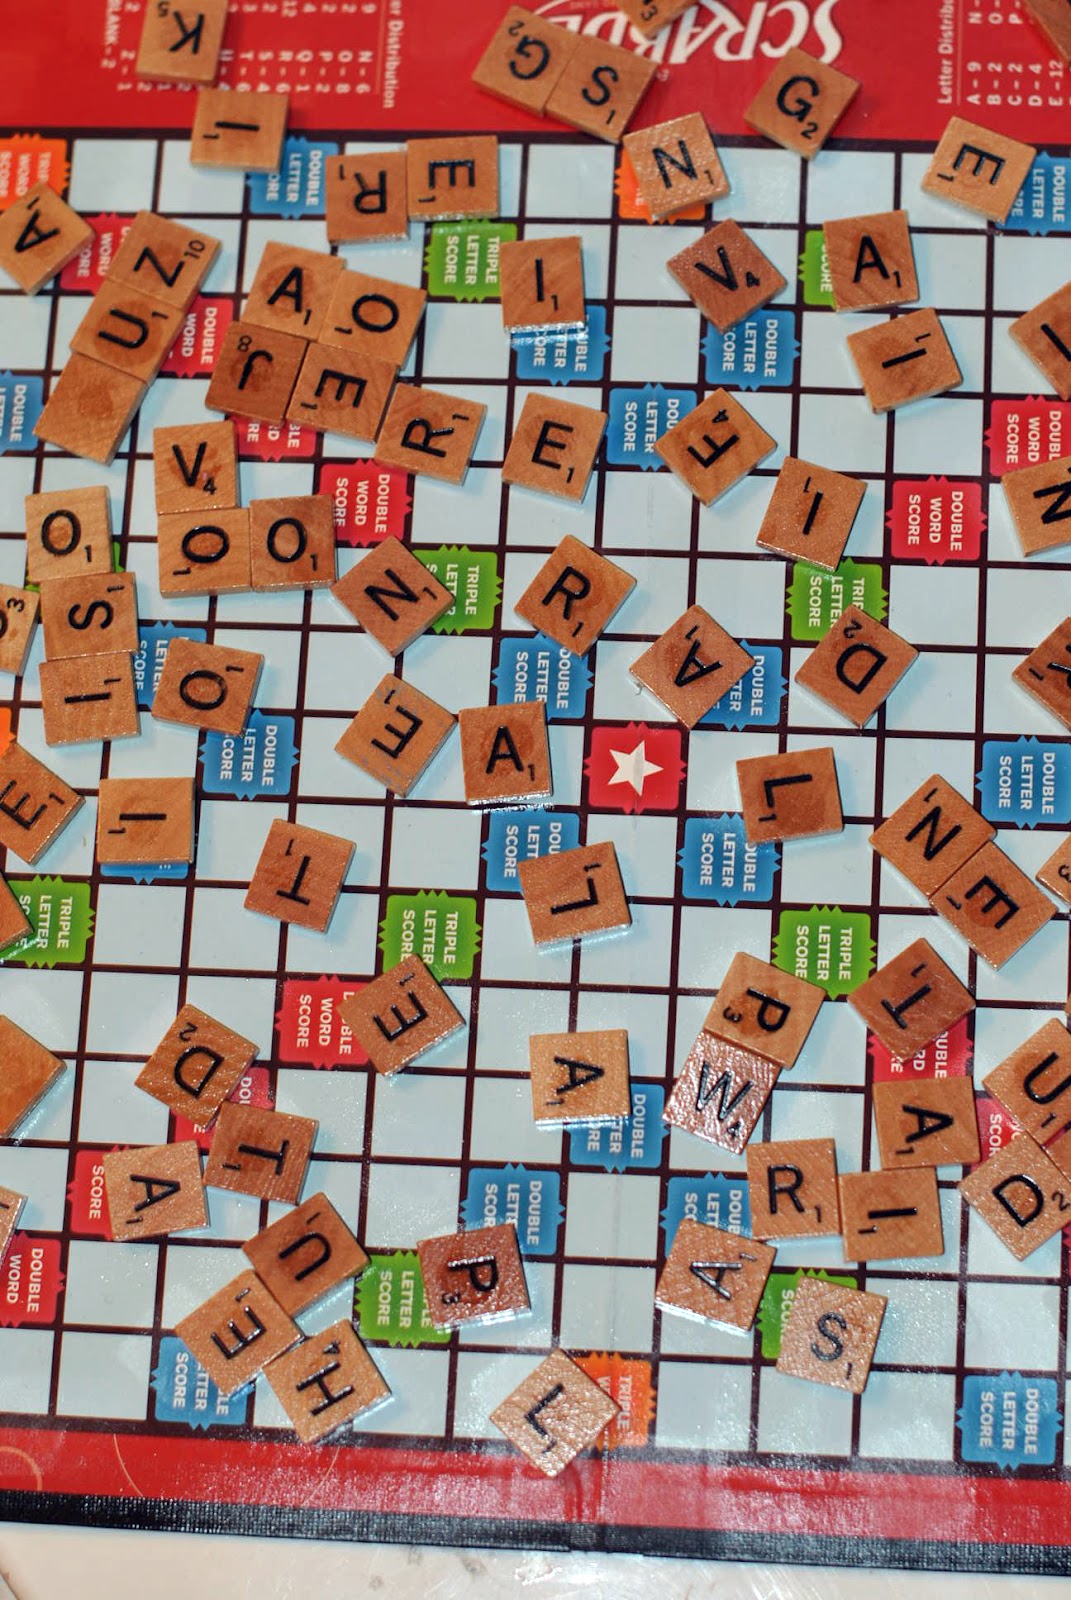
And here is the finished product...
 |
Beautiful!
Ta-Da!!!!!!!!!!!!!!!! I love this little.. errrr big board! I think all of the time spent on it was worth it! I will be adding more tiles (but just to get this DIY Tutorial done, I went with what I had)
I hope you all had fun reading and I hope this has inspired you all to do something creative!
Have a great day!
Thursday, May 3, 2012
This week up until this point
My Week Up Until This Point
This week has been crazy, I have started working at a Bridal shop, which I love it! I just have to get used to not talking to my baby (as much) while he is still deployed. Ugh... that is what is killing me right now. for Almost a year we have had our normal routine going and it has changed.
In between work, taking care of the twins, the house, and filling orders, trying to keep up with the blog and trying to come up with new pieces and what charities they will benefit it has been quite crazy. I don't know if I do this to myself on purpose or do it to myself because I love to help people or try my hand at all sorts of new things. I know come Sunday I will be one happy girl that is for sure! (Sunday the shop is closed {the Bridal Shop that is} )
Then at the end of May some exciting things will be taking place, for me and Rue Paradis, it is huge, I know there are some out there who have not been quite as happy with my decision as I am but when it comes down to it, Rue Paradis is my baby, I created it, I want to see it succeed I don't want it to be ran into the ground because of an unwise move on my part. And as long as Rue Paradis is MY baby, that will not happen. I take pride in what goes out of my doors, if an order leaves my work space and is packaged up, then I am not 100% on it. If not it will NOT go out. {Unless designed by a client, then it will be what THEY want} and as long as Rue Paradis is in my control, every order will ALWAYS benefit some charity.
Also at the end of May, Rue Paradis will be closed on the 30th and 31st, for personal reasons. No orders will be made/Processed/Shipped.
Currently I am waiting on some magnets to arrive (gotta love eBay!) When I tracked the shipping the tracker said it would be here either 5/4 or 5/5 :) lets hope so! :) I have plans for those magnets! And hopefully what I plan on creating in the DIY will inspire you to create something too :) {I would love to see what you created}
But anyways My baby is online (I can't wait for him to be home!) sooooo bye for now :)
Wednesday, May 2, 2012
The First DIY Tutorial of the blog!
This is a super simple Tutorial for an all natural (Moisturizing) Lip Balm (there are no chemicals in this btw!)
Ingredients
Olive Oil
Almond Oil
Cocoa Butter
Coconut Oil
Beeswax (shaved or pellets)
Vitamin E (serves as a moisturizer as well as a preservative)
This makes 3 ounces or about 15 tubes (depending on how you want to store it I used 1 ounce pots)
The formula
4Tsp olive oil
2 Tsp Almond Oil
2 1/2 Tsp cocoa butter
3 3/4 Tsp coconut oil
3 1/2 Tsp beeswax (cosmetic grade)
5 Drops of Vitamin E
I use the microwave method... you can use a double broiler if you would like but this is easy, all you will need is a pyrex measuring cup (GLASS) the reason why is because the beeswax is hard to clean off so it goes a little better with a glass measuring cup now... on to the fun stuff!
Measure out and combine all ingredients EXCEPT FOR THE VITAMIN E (this goes in AFTER IT IS ALL MELTED TOGETHER) (you will smell a hint of chocolate... this is just the cocoa butter as it melts... YUMMMMMYYYY!!!!)
Then 20 second burst in the microwave (taking out and stirring in between) until melted together...
I hope you enjoyed my first DIY Tutorial (there will be another one posted as soon as the item I really need comes in :) )
Ingredients
Olive Oil
Almond Oil
Cocoa Butter
Coconut Oil
Beeswax (shaved or pellets)
Vitamin E (serves as a moisturizer as well as a preservative)
This makes 3 ounces or about 15 tubes (depending on how you want to store it I used 1 ounce pots)
The formula
4Tsp olive oil
2 Tsp Almond Oil
2 1/2 Tsp cocoa butter
3 3/4 Tsp coconut oil
3 1/2 Tsp beeswax (cosmetic grade)
5 Drops of Vitamin E
I use the microwave method... you can use a double broiler if you would like but this is easy, all you will need is a pyrex measuring cup (GLASS) the reason why is because the beeswax is hard to clean off so it goes a little better with a glass measuring cup now... on to the fun stuff!
 |
| Everything but the Vitamin E |
Measure out and combine all ingredients EXCEPT FOR THE VITAMIN E (this goes in AFTER IT IS ALL MELTED TOGETHER) (you will smell a hint of chocolate... this is just the cocoa butter as it melts... YUMMMMMYYYY!!!!)
Then 20 second burst in the microwave (taking out and stirring in between) until melted together...
 |
| Almost there... |
 |
| All melted together... time to add in the drops of Vitamin E.. |
 |
| Pour into containers quickly (because it will set fast) |
 |
| after about 2 minutes it is almost all the way set. |
I hope you enjoyed my first DIY Tutorial (there will be another one posted as soon as the item I really need comes in :) )
Monday, April 23, 2012
I am guess introductions are in order.... :)
I Guess Introductions are In Order
My name is Sarah, I am the owner of Rue Paradis (Pronounced Roo Pair-ah-dee).
♥ I have two AMAZING little boys, twins might I add who have had my heart since before they were born. I am also blessed with an AMAZING (soon to be) Hubby :) but he is away on deployment for another 80 some odd days (ok, so it is 81 days left... I won't even lie... I am on the countdown so I know how many are actually left haha) But these three guys give me SOOOOO many reasons to smile and they are my world ♥
I am a full time nursing student (which has so far come in handy when the boys get into stuff ;) ) I am twenty-something (yeah unfortunately I have kept count on that one but I will keep that "something" to myself.
I love to create things I always have, I think it comes from my Grandmother. But I think I am worse. I love to find the beauty in pretty much anything (I think anything can be fixed with some light...-ish sanding and a few cans of Krylon ;) and this attitude comes into play when I'm turning an old door into a headboard, or old wooden windows into a necklace hanger with a message board and mirrors (and the other one into a coffee table) (and trust me, you will see posts on things like that on this blog, I love to share my creative side with people. I also ♥ photography which you will see a lot of photos here all the time (who knows you might even see a few in this post ;) ) I also love to help people (hopefully the nursing major gave that part away) Since I am not done with my degree JUST yet... I thought of another way I could help... every order that is placed with my shop helps out a charity (for a list of the Charities head over to the Charity Work page) I do this for a few reasons. (Which you can also read about on the Charity Work page)
I am a Daughter to two great parents, a Sister to a wonderful brother, (soon to be) "Wifey" (as he calls it..and I love hearing it ;) to my Brown Eyes (his eyes are.... ah-maze-ing!!! hence his nickname ;) ), a Mommy to my lil guys, a Friend to pretty much everyone and last but not least, Crafter. (I have been called a “Jill of all trades” by the people that know me best) So keep checking back to see what projects I am working on (whether it be jewelry or something completely different) or just a random post :)
Subscribe to:
Posts (Atom)
Popular Posts
-
 {The Effects of Being} a Master Carpenters Daughter… So my Dad is awesome! (I “may” be biased because it is MY Dad, or maybe a hin...
 -
 I Guess Introductions are In Order My name is Sarah, I am the owner of Rue Paradis (Pronounced Roo Pair-ah-dee). ♥ I have two A...
 -
My Week Up Until This Point This week has been crazy, I have started working at a Bridal shop, which I love it! I just have to get ...
-
 The Magnetic Scrabble Board!!! To do this project you will need the following... And old Frame (preferably a big one)...
Stay In Touch


Subscribe To Rue Paradis


LP